Wednesday, March 27, 2013

Oval Bunny Basket made from Stampin' Up Framelits - another great idea!

Mar 19     Oval Framelit Bunny Basket
I can’t believe how fast Easter is coming up this year! My calendar is quickly filling up with egg hunts, classroom parties, and family dinners—so I’ve been playing with some different ideas for little favors and treats. Today, I wanted to share one of my favorites with you!


Didn’t he turn out cute? Plus he’s really simple and quick to put together.

I had some More Amore Specialty Designer Series Paper left over from Valentine’s Day projects, so I used that and Naturals Ivory Cardstock. I stamped my cardstock with the Distressed Dots Background Stamp and embossed it with Clear Stampin’ Emboss Powder to give it some texture.

After that, I used a few dies and punches to build my Easter Bunny. Here is a list of the parts you’ll need:
Body: Ovals Collection Framelits Dies (I used the fourth from the smallest)
Hands: Ovals Collection Framelits Dies (smallest oval cut in half)
Feet: Ovals Collection Framelits Dies (smallest oval cut in half)
Ears: Ovals Collection Framelits Dies (smallest oval) and Large Oval Punch
Nose: Small Heart Punch (trim off the top edge of the heart)
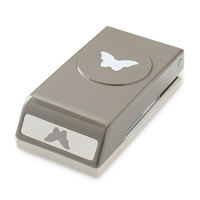
Eyes: Owl Punch
Whiskers: Pool Party Baker’s Twine
Egg: Small Oval Punch, Owl Punch (heart), Bitty Banners Framelits Die (banner)
Basket: Petite Purse Bigz L Die

I hope you’ll be able to use this project as you celebrate Easter and spring this year.
Happy Easter!
Carrie C.
Curriculum Developer & Training at Stampin' Up

Monday, March 25, 2013

Stampin' Up Fabric Frenzy - all fabric 50% off!

Here's a great video showcasing projects made with fabric. The Stampin' Up fabric really is vibrant and beautiful; trust me, you can't go wrong buying some. And at this price, you'll actually use it instead of hoarding it like I do! Stampin' Up is selling all its fabric at 50% off for 1 week only, so go order some now before you're favorite pattern goes out of stock!


Promotion Details:
* For one week only, all of our beautiful Designer Fabric is 50 percent off!
* Promotion dates: Monday, March 25-Sunday, March 31, 2013.
* No minimum purchase required to receive the discount/
* All items are limited quantity at the discounted price; the discount will be removed once the limit is reached.

Thanks for visiting and have a great week!

Tuesday, March 19, 2013

Stampin' Up Pinwheel Cupcake Toppers

I saw this on the Stampin' Up Blog last week and forgot to post it; I just LOVE cupcakes and these are a great idea!


Products used:
Pinwheel Sizzlet - item # 129411 $4.95 (about 2" x 2"):

Pinwheel Sizzlits S Die
In Color Dahlias - item # 127556 $7.95 (about 3/8"):

In Color Dahlias
Bitty Butterfly Punch - item #  129406 $15.95

Bitty Butterfly Punch
Plus Cardstock: Primrose Petals, Sahara Sand, Pink Pirouette.  Plus the 1-1/4" or 1-3/8" circle punch and Baker's Twine.

Monday, March 18, 2013

My Digital Studio Software Changes are AWESOME!

Big Changes for My Digital Studio:


WOW, Stampin' Up made some HUGE changes to the My Digital Studio Software:
  1. Stampin' Up is changing the name of the software to MDS. Now, you might be asking yourself, didn’t it just change to MDS 2 last year? Yep, it sure did.
  2. Stampin' Up is lowering the price! What has been known as MDS 2+ is now ONLY $19.95 US/$24.95 CAN and will be called . . . yes, you guessed it, MDS. It’s the same great software and content at a fantastic new price.  Believe me, this software is SO WORTH THE PRICE!
  3. Coming soon: all of you who have been holding onto the original My Digital Studio software will be able to UPGRADE for FREE. Stampin' Up will be letting us know as soon as it is available. YIPPEE! 
With all these changes, be sure to check the My Digital Studio website at www.mydigitalstudio.com for latest updates, samples,  video tutorials and more!  Other info you may want to know:
  • Stampin' Up will still offer a free 30-day trial version of the MDS software for anyone who had not previously tried the MDS 2 Trial.
  • The original My Digital Studio software (not the product line) is going away, including support for it. The free upgrade will be available soon!
  • MDS 2 (the software that didn’t have much content) is going away.
  • You can still get the software on a disc (item 130647) or as a download (item 130646). Just keep in mind the disc will say MDS 2+ on it because it will take us awhile to switch everything out.

Saturday, March 16, 2013

Stampin' Up Sneak Peak Stamp Set!

It's Saturday and I'm heading off to work; people want their tax returns!  I just wanted to post this to keep you informed of what's going on at Stampin' Up.  This is a SNEAK PEAK of a great stamp set that will be in the NEW 2013-2014 Catalog.  Don't forget that Sale-a-Bration is going until next Friday, March 22nd, so you can purchase this bundle and add a couple more things and get a FREE stamp set or accessory!  Don't forget to choose me as your Demosntrator when you sign into, or create, your ONLINE account here.


 stampin up, dostamping, dawn olchefske, demonstrator, special, Spring Surprise Bundle, A Round Array stamp set, 2013/2014 Annual Catalog

From March 15 through May 30, Stampin' Up has bundled this new stamp set with the coordinating 7/8" Scallop Circle Punch (introduced in the 2013 spring catalog)!

Spring Surprise Bundles* $23.95
A Round Array Stamp Set*, set of 8 for only $14.95
*Only offered in clear-mount. Wood-mount option will be available during the 2013–2014 annual catalog.

Thursday, March 14, 2013

Stampin' Up Pop Up Posies Flower Tutorial - too cute!

Please note that this post is directly from the Stampin' Up blog:

Article was written (and flowers were designed) by Stampin' Up Concept Artist Melody H.


Spring is in the air—and to me that means bright happy colors and flowers! I love to make paper flowers. Depending on the type of flower I want to make and the tools I use, it can be an involved process and take a lot of time. Creating paper flowers with the Pop-Up Posies Designer Kit is easy, though, because the flowers come pre-cut and ready to go.

The first step is to take six flowers and curl the end of each petal with a Bone Folder.


Next, with the petals curling down, pinch the flower between your fingers so that it’s puckered in the center.


Expand the flower and add a small dab of hot glue to the center.


Then pinch it together again until the glue has dried.


Repeat the process for all six flowers. Once you have them all pinched and glued in the center, take a length of floral wire and glue one flower to the end.


Add one flower at a time to create a pouf.


Once all of the flowers are attached, add a bit of glitz by spritzing with Vanilla Shimmer Smooch Spritz.

I wrapped a bit of Calypso Coral Baker’s Twine around my vase to dress it up a little and then decided I needed a bunny to really make it feel like springtime and Easter. The Ears To You stamp (in Single Stamps: Assortment 3) is adorable! And by adding one of the fabric brads from the Pop-Up Posies Designer Kit for his little cottontail and dressing him up in a bowtie, I just love him even more.


Here’s a quick shot of how I used the clover from the Itty Bitty Shapes Punch Pack to make a bowtie.


I hope you’re finding ways to welcome springtime into your home with some fun, handmade décor!  Have a great weekend!

Tuesday, March 12, 2013

Sale-a-Bration Bloomin' Marvelous Card


I saw this great card made by fellow demonstrator Sandi MacIver and I just had to CASE (Create And Share Everything) it!  I loved the colors she used and the design; thanks so much for sharing Sandi!  To make the card, you'll need the Bloomin' Marvelous stamp set and the Vine Street Embossing Folder from the Sale-a-Bration brochure.  Colors of ink and cardstock are Summer Starfruit, Sahara Sand, Island Indigo, and Pool Party.  I'm going to be sad when the end of May comes and Island Indigo and Pool Party are retired!

I also used the new Bitty Butterfly punch from the Spring Mini Catalog to cut out the butterfly and I just used my Snips to cut out the flowers.  I attached the flowers using Mini Glue Dots then added some Rhinestones for BLING!  This card is great for mailing and just to look at; it's getting me in the mood for Spring!

Thanks for stopping by!  I didn't include details on measurements and item numbers because I figure mostly other Demonstrators visit my blog, but if I get comments from you saying you'd like me to start including those details, I'd be happy to.

Wednesday, March 6, 2013

Stampin' Up Masking Tutorial

OMG!  I finally got this Stampin' Up masking tutorial to upload; the only way was by changing to Firefox as my internet browser; thanks Heather for that suggestion.  I got tired of rigging it through blogger.  Maybe now I can load some pictures of cards!  Anyway, you should be able to click on the image below to enlarge it; this is a great masculine 'thank you" card, but I would use brighter colors for my gal pals!  Have a great day!


Tuesday, March 5, 2013

Stampin' Up DIY Easter ideas!

Here are some awesome DIY Easter projects Stampin' Up is sharing on its blog.  Click here to see the full blog article describing what was used to make these projects.

Just a note that I'm in the throws of tax season and I don't know how much I'll be able to blog, so thanks for being patient with me until April 15th!

Friday, March 1, 2013

Stampin' Up introduces Photopolymer Stamps - video and samples - PLUS March's Best of 25 Years Stamp Set!

Here's the funny video talking about "what is" photopolymer; it doesn't show any stamping, it's just a funny intro for the new line of stamps! Email subscribers, please click on the above Post Title to get to my blog and watch the video.


Here's the first Photopolymer Stamp Set Stampin' Up is offering:


Here are the benefits of Photopolymer:

First, they’re completely clear, making it oh-so-easy to stamp exactly where you want. They come unmounted, on an acetate sheet, and temporarily adhere to our clear blocks. It's really great that they line up well and close; there aren't gaps between letters!


Second, they are pliable. Want your arrow to shoot a certain way? No problem! Want your banner to have the perfect sag? Easy peasy! Being able to play with the shape gives you even more creative freedom.


The Designer Typeset Stamp Set is in the online store starting now. You can go HERE to order.  Here are some stamp set samples:


And here is the March "Best of 25 Years" Stamp Set; don't forget about keeping track of these purchasces with the collectors card; get it here!
Best Of Flowers Clear-mount Stamp Set
Have a great weekend and thanks for stopping by!