Wednesday, February 27, 2013

INTRODUCING Stampin' Up's first ONLINE CLASS called "The Basics" you can download and enjoy in your jammies!

133385L
PERFECT FOR THE BUSY or NEW STAMPER! Learn innovative ways to get the most out of your Stampin' Up! supplies (from stamps to the Big Shot) with clever tips and all the techniques you need to start creating with success.  This downloadable class kit is divided into six sections focused on a variety of topics.  Stampin' Up's on-line classes include videos, pdfs, and supply lists for 30+ projects.

UPDATED 3/1/13: The following topics are covered in the class: Basic Stamping, Embossing, Masking, Stamp-a-ma-jig, Watercoloring & Markers, and Big Shot & Punch Basics. 

This Stampin' Up "class kit" contains a lot of details, tips and new ideas; it's great for the new stamper as well as the experienced stamper.  Because it goes over the "BASICS", it will help a new stamper get started and it will remind the experienced stamper about how great the basics are and give great ideas on how to use them with today's products!  For example, there's a video in this class on how to use the Stamp-a-ma-jig to easily line up stamped letters!

CLICK HERE TO ORDER 'THE BASICS" ONLINE CLASS for $14.95 and don't forget to check out the CLEARANCE RACK for more great deals!  Please be certain to select me as your DEMONSTRATOR when you CREATE, or SIGN INTO, your ONLINE ACCOUNT.  When you purchase this class through me you get SALE-a-BRATION Freebies and PREFERRED PRICING and it counts towards my FREQUENT SHOPPER REWARDS PROGRAM! 

This downloadable class contains ZIP FILES that you simply open on your computer desktop; you don't need to have My Digital Studio to get this class!   After purchasing and downloading the class, simply open "Stampin' Class--The Basics" folder and there will be six folders inside. Click on each and enjoy!

PC Instructions The files will be downloaded as archive files that you can then extract and save on your computer. When you click on the download link, an extraction program will automatically launch. Choose the location where you would like to save the files (be sure to note where you save them). Follow the prompts on the extraction program, then navigate to the location where you saved the files. Click on the file and open.

Mac Instructions When you click on the download link, the file will be mounted as a drive. Once it is mounted, open the drive and drag and drop the files to the location of your choice on your hard drive. The files can then be opened.

Monday, February 25, 2013

Stampin' Up Bleaching Technique Tutorial using the Oh, Hello Stamp Set

Below is another Stampin' Up Technique Flyer showcasing a card using the bleaching technique (and I love the little pinwheel too!). Have a great week and thanks for stopping by!


Friday, February 22, 2013

Altered Stampin' Up Mini Milk Carton Die Tutorial


A Concept Artist, Melody, at Stampin' Up created this wonderful milk carton by using Stampin' Up's Big Shot Milk Carton die in a different way.  The Milk Carton is a fun Die because you can make it taller, shorter, and wider; there are lots of possibilities. Melody chose to go wider this time. Here’s how she put it together. 


Step 1: Cut out two milk cartons, fold on the lines as shown, and cut off two panels as shown.

Step 2: Apply Sticky Strip to the tabs on both of the milk cartons.

Step 3: Attach the half milk carton to the full milk carton, then fold the bottom flaps under the top as shown. Close the milk carton with the Sticky Strip on the other tab. Fold the bottom panels under and secure together with SNAIL Adhesive.

Step 4: Take the half of the milk carton that was cut off and cut 3" from one of the panels.

Step 5: Use Sticky Strip to stick the 3" panel to the bottom of the milk carton to make it sturdier.

Step 6: Fill your carton with treats and close the top with Sticky Strip, a mini clothespin, or other closure of your choice.

These adorable little gift boxes would be great for a party favor, a quick thank you treat, or a birthday gift. What else would you do with a tiny paper airplane?  To make the small airplane on the tag, Melody used a 2-1/4" x 2-1/2" rectangular piece of paper.

The original Stampin' Up Blog post can be found here, and more samples of this same concept can be found in the annual catalog, p. 68.   Have a great weekend!

Thursday, February 21, 2013

Sale-a-Bration Stamp Set Samples from Leadership

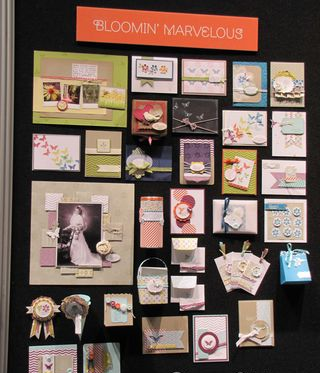
I wanted to share these pictures of display boards from Stampin' Up's Leadership Event.  I didn't have a chance to go, so I love to see the display boards for ideas!  These boards feature 4 of the Sale-a-Bration FREE stamp sets.  I know they're blurry, but I got them from a friend, who got them from a friend; I don't know who the photographer was.  I just like to see the samples and I hope you do too - have a great day!

Tuesday, February 19, 2013

Stampin' Up Made for You Stamp Set card tutorial

Gosh, I finally was able to load this Stampin' Up tutorial! I had one day of success last week loading images, but frustration again! Kadie, I'll be emailing you for more help I think! Anyway, I love how the flower on this card was made and the card layout.

Don't forget that you can click on the image below to view it enlarged.  Have a great week!


Thursday, February 14, 2013

Stampin' Up Valentine's Day projects using More Amore DSP and more!

 
Colors on the card are Primrose Petals, Real Red, Pool Party, and Very Vanilla.  I used More Amore DSP, Real Red Core'dinations cardstock, and Pool Party and Very Vanilla cardstock.  You can't see it well, but I ran the Red Core'dinations paper through the Honeycomb embossing folder then sanded it.  The "Love" came from the You Are Loved stamp set; I colored it with Real Red, Lucky Limeade, Pool Party, and Island Indigo markers.  Finally, I added some Pool Party ruffled ribbon and a great flower from the Flower Trim ribbon in the current Spring Mini Catalog.  I dyed it with a sponge and Pool Party classic ink.

 
 This Valentine treat was made with the Valentine bundle Stampin' Up offered last month.  I put peanut M&M's in the 1x8 cello bag then topped it some hearts.  I stamped the "happy valentine's day" in VersaMark then used Melon Mambo embossing powder on it and cut it out using the Full Heart Punch.  Then I layered that onto a heart I cut out using the Scalloped Heart Embosslit and finally I layered that onto a heart that I die cut using a Heart Framelit.  I ran the biggest heart through the Vintage Wallpaper Embossing folder.

Thanks for stopping by and Happy Valentine's Day!

PS:  Thanks Kadie for the photo upload help; it seems to be working for now - why does Blogger change things, and not for the better!

Wednesday, February 13, 2013

HELP needed - why can't I get my png or jpeg or gif files to upload?

Hi everyone, I'm needing some help! I've been trying for the last couple of days to upload some images and Blogger keeps kicking them out, saying "server returned invalid response".  Does anyone know what I'm doing wrong.  I used to be able to bypass this by going into HTML mode, but now the image upload has changed and I don't understand what I'm doing wrong when I try to upload a photo.   I've converted files to jpeg, to png, and to gif and nothing seems to work!

I know everyone's busy nowadays, but if you can let me know what I need to do, I'd appreciate your help!!  Thanks

Tuesday, February 12, 2013

Stampin' Up Valentine's Day frog card and Greeting Card Kids ornament

Here's an example of a masculine Valentine's Day card made by Stacey M, Executive Assistant at Stampin' Up, find the blog post here.  Unfortunately she didnt' give details of the supplies she used, but I think the idea of a frog valentine is great for little boys!


And here's an example of a very feminine Valentine's Day ornament I made for my niece last year. I still really love it and I hope it inspires you to make something cute and fun this week. The original post is here.
 
Thanks for stopping by and have a great week!

Wednesday, February 6, 2013

Stampin' Up Video Tutorial: Reverse Masking Technique

Here's another Stampin' Up video. This one shows how to apply the Reverse Masking Technique. I promise to post some cards soon, but I hope you enjoy these videos in the meantime!

Tuesday, February 5, 2013

Stampin' Up Video: Vine Street Embossing Folder

Below is a new video tutorial Stampin' Up put together to showcase the Vine Street Embossing Folder in the Sale-a-Bration (SAB) Brochure. This is one of many products you can get FREE when you place a qualifying order! I love the card samples shown at the end of the video made with different SAB stamp sets; take a look!

(email subscribers, click on the email title and you'll get to my blog  to watch the video)


Saturday, February 2, 2013

Stampin' Up Best of 25 Years February Stamp Set

FEBRUARY 2013 RELEASE:

JANUARY 2013 RELEASE:

REMINDER:  As part of SU's 25-year anniversary celebration, it's bringing back some of its favorite stamp images from the last quarter century and combining them into 12 sets, which will release-one set per month-during 2013.  Even better, along with some great classic images, each "Best of" set will also include a never-before-seen image!

Some things to remember:
  • All Best of stamp sets will include 3-5 images, including a never-before seen image, and will be priced at $14.95.
  • While we are releasing just one Best of stamp set per month (with a new theme each month), all of the Best of sets will be available until March 31, 2014.
  • A new flyer will be released every month for each new Best of set.
  • All Best of stamp sets are available in Clear-Mount only.
As a special incentive to collect the Best of stamps, we're including a collector's card and 25-year proof of purchase sticker with every Best of set.  Collect six stickers, and send it in to redeem a FREE set of your choice valued up to $14.95!  Free sets must be redeemed no later than April 30, 2014.

Friday, February 1, 2013

Stampin' Up Sent With Love Special Promotion

(CLICK HERE TO DOWNLOAD FLYER)

Dates: February 1 - April 30, 2013 (updated 2/2/13: see example of stamp set & DSP below)

Details:
During this limited-time offer, you can purchase the exclusive Sent with Love Stamp Set or Sent with Love Designer Series Paper-or bundle them for a special 20 percent discount!

Use the Sent with Love product suite to make some really cute and trendy travel-themed projects.

Item
Description
Price
131847
Sent with Love Stamp Set (clear-mount; English only)
$17.95
132182
Sent with Love Designer Series Paper
$10.95
132851
Pretty Bundle
Includes the Sent with Love Stamp Set, Sent with Love Designer Series Paper, and Calypso Coral Baker's Twine
$25.50
20% off retail value!

The Sent with Love Stamp Set and Sent with Love Designer Series Paper are only available during this special offer; until.April 30.

In addition, you may purchase the Sent with Love Digital Kit (item 132914; $9.95). Please note that the digital kit is not included in the bundle.

VIEW OF STAMP SET & DESIGNER PAPER:

Sent with Love DSP Favorite, stampin up, dawn olchefske, dostamping, travel
Sent with Love DSP , stampin up, dawn olchefske, dostamping, travel
Sent with Love DSP Favorite, stampin up, dawn olchefske, dostamping, travel

Have a great weekend and thanks for stopping by!